Open topic with navigation
Configure Departments
Configure departments to manage cost accounting by department.
Use the instructions below to configure a new department.
|
1.
|
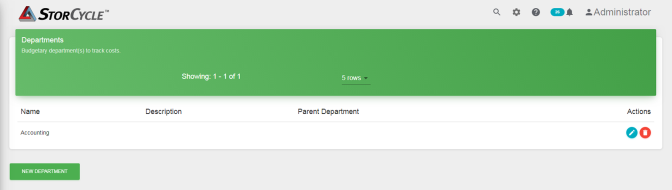
Click the Settings icon (gear) in the toolbar and then select Departments. The Departments screen displays showing all departments currently configured in the software. |
|
2.
|
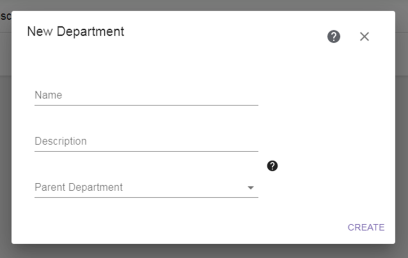
Click New Department. The New Department dialog box displays. |
|
3.
|
Enter a unique Name for the department. |
|
4.
|
If desired, enter a Description for the department. |
|
5.
|
If applicable, use the drop-down list to select the Parent Department to which this department belongs. |
|
6.
|
Click Submit to save the department configuration. |
|
7.
|
If necessary, repeat Step 2 through Step 6 to add additional departments. |
Edit a Department
To edit a department, click the Edit icon (blue circle with a pencil) next to the department on the Department screen (see Figure 16). Edit the Description and Parent Department as desired and click Update. If you want to change the name of a department, delete the department and then recreate it with the new name.
Delete a Department
To delete a department, click the Delete icon (red circle with a trash can) next to the department on the Department screen (see Figure 16). A confirmation screen displays. Click Delete to confirm the department deletion.