Notes:
• | The StorCycle solution uses the domains configured on the server, including multiple domains, to access a DNS (Domain Name System) to resolve UNC (Universal Naming Convention) paths over the domain and uses Active Directory / LDAP to verify restore users are valid on the domain. |
• | StorCycle does not support anonymous requests to Active Directory / LDAP. In order to receive e-mail updates, users must have valid Active Directory / LDAP credentials. |
If desired, use the instructions below to configure Active Directory / LDAP.
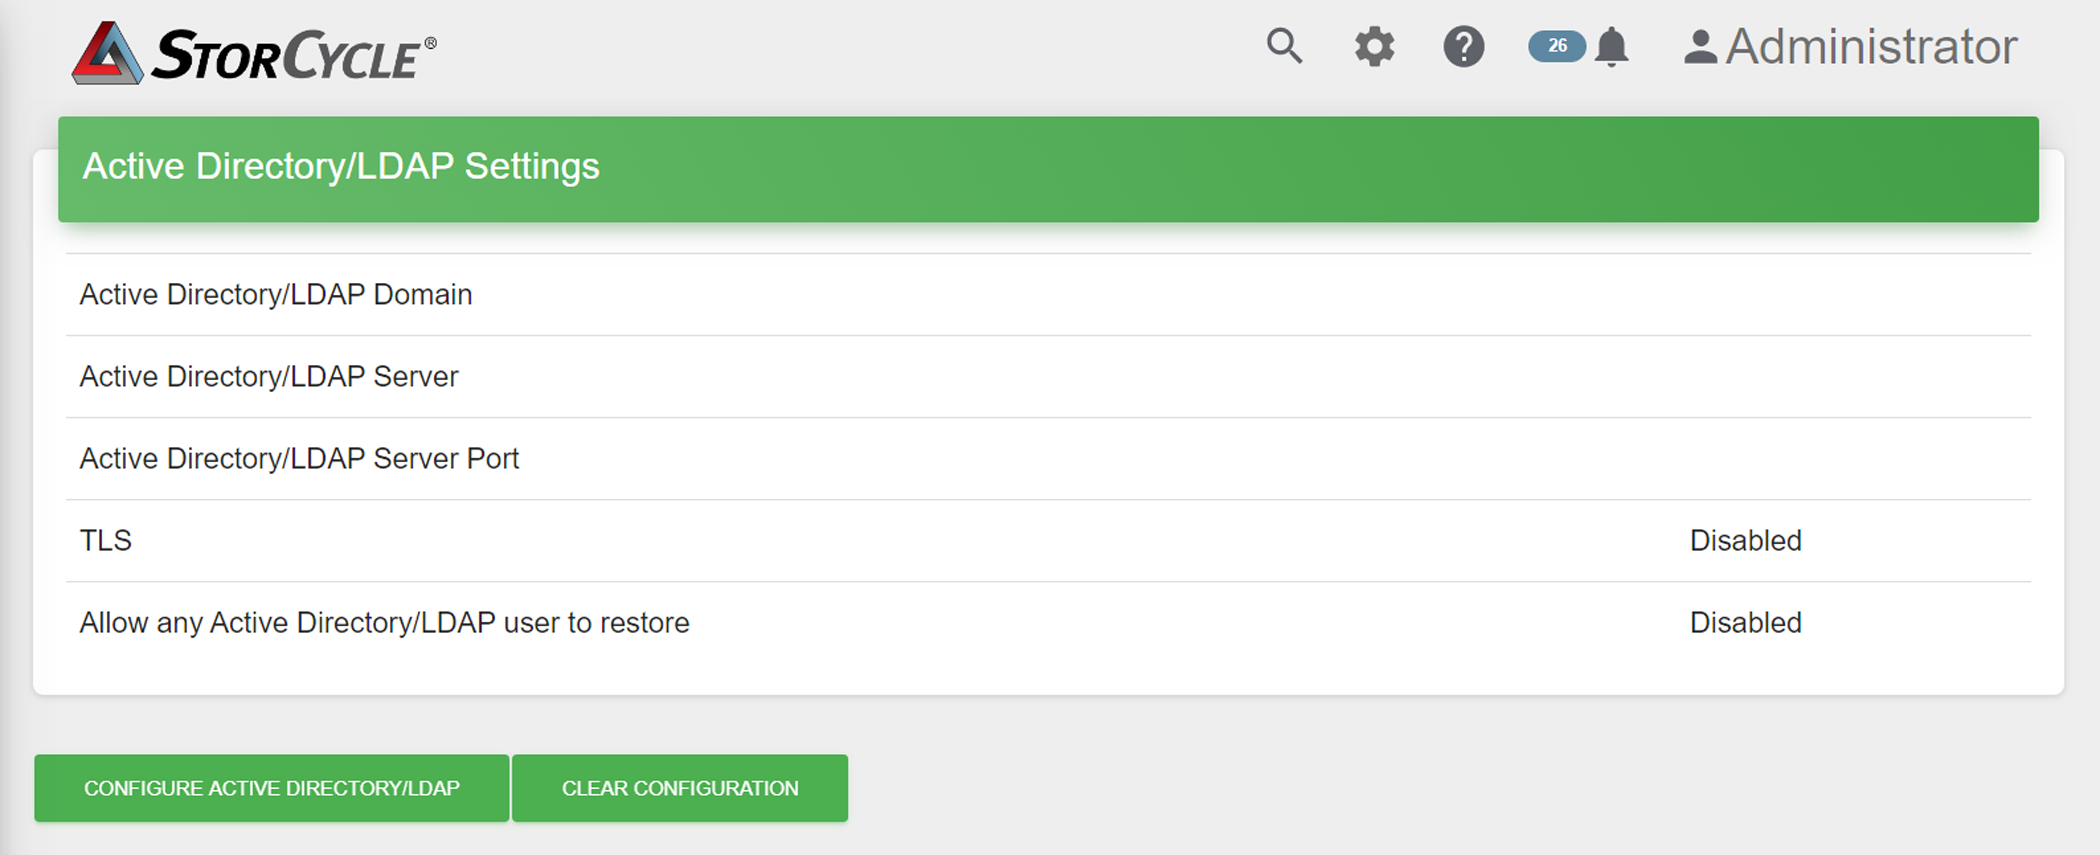
1. | Click Settings in the toolbar and then select Active Directory / LDAP. The Active Directory / LDAP Settings screen displays showing the current Active Directory / LDAP settings. |
|
Figure 11 The Active Directory / LDAP Settings screen. |
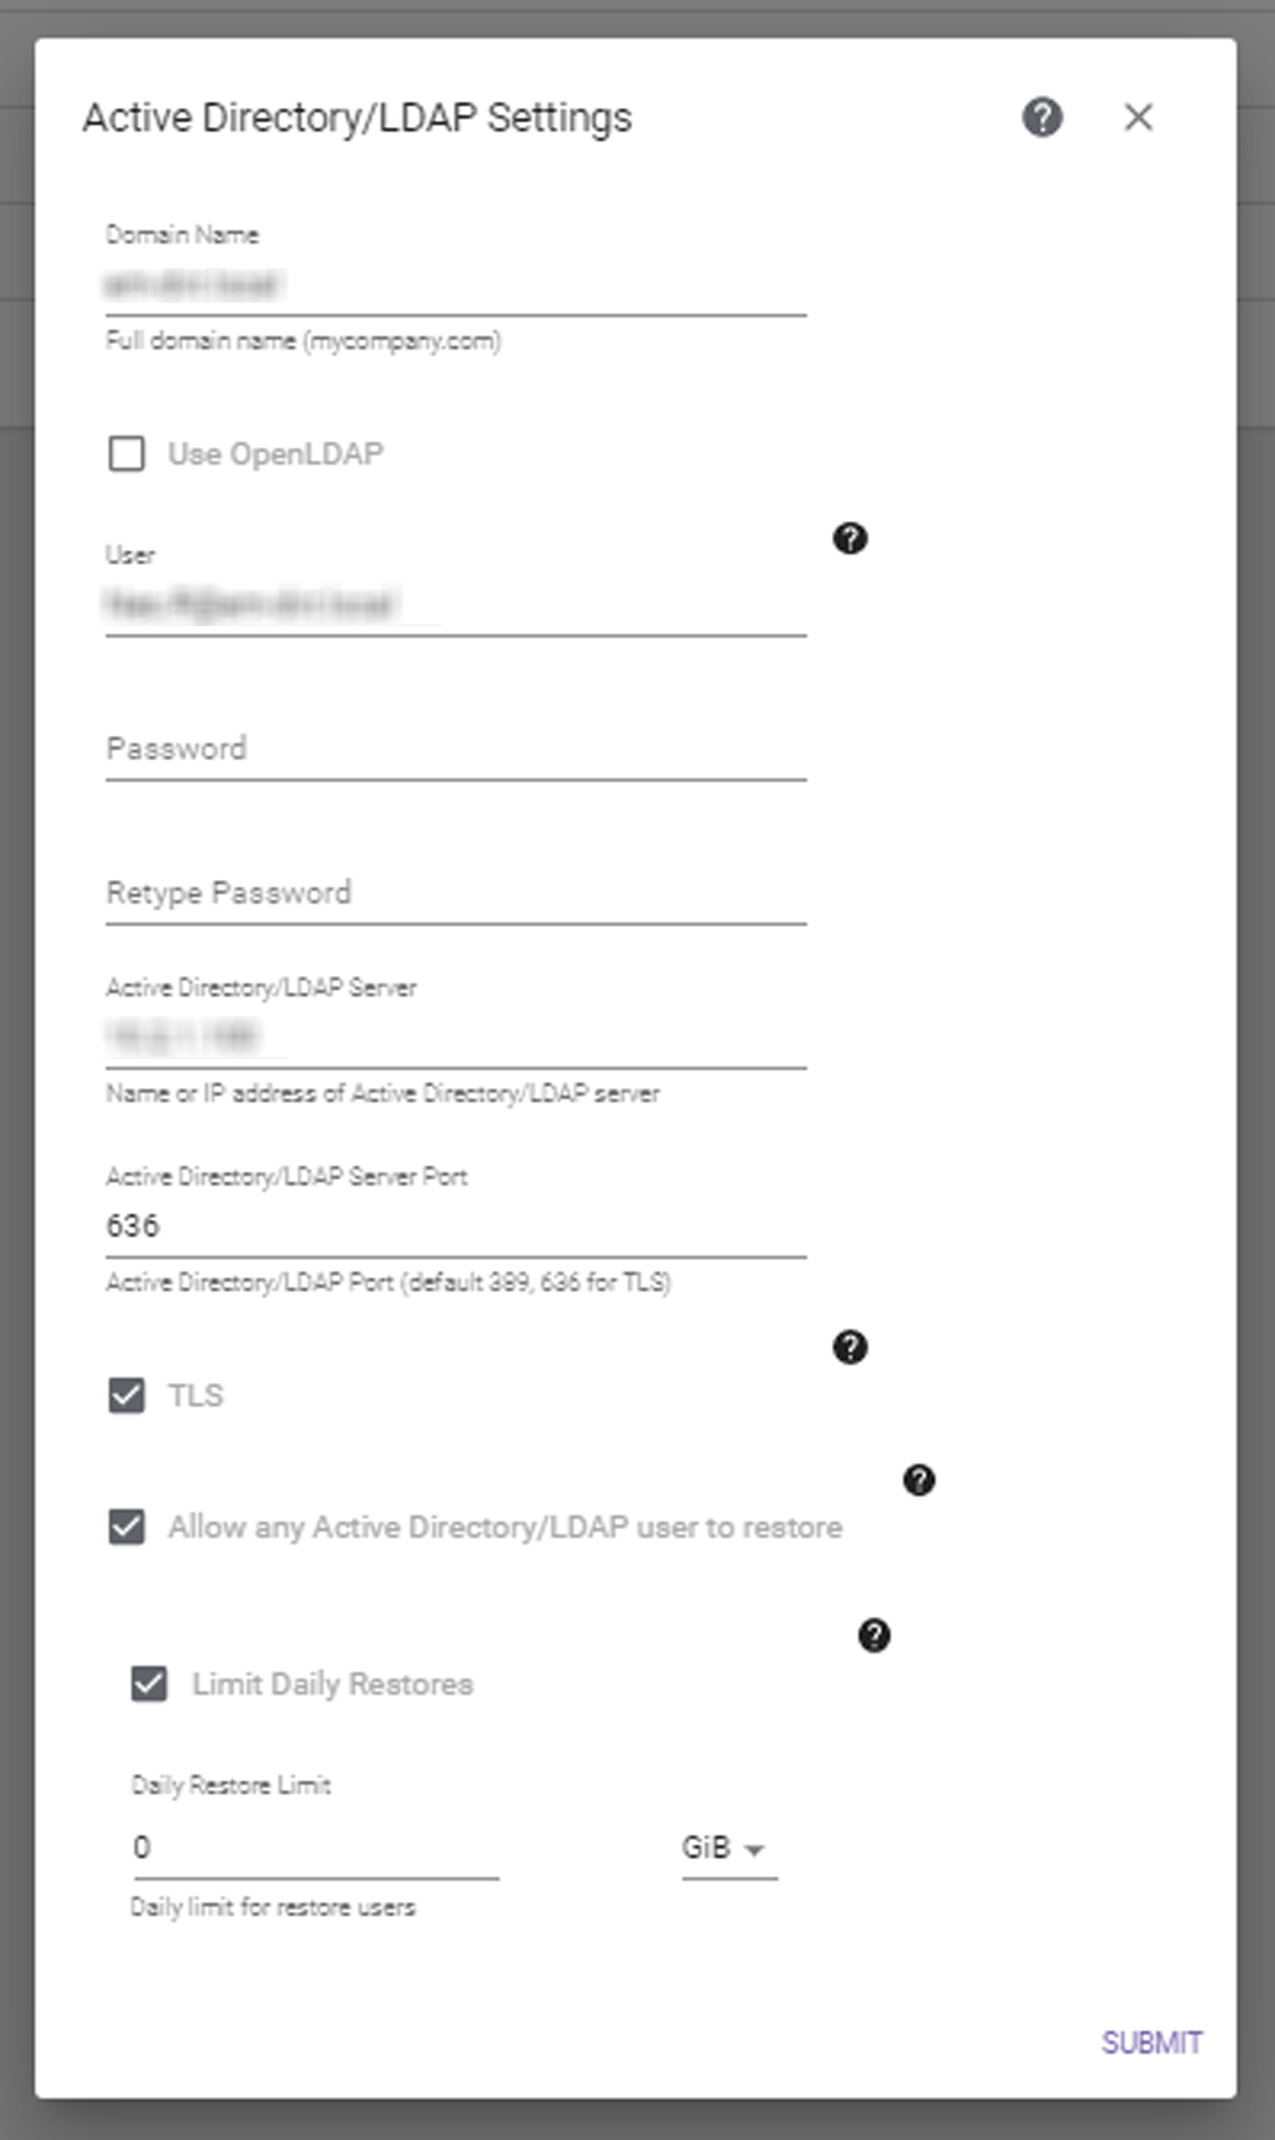
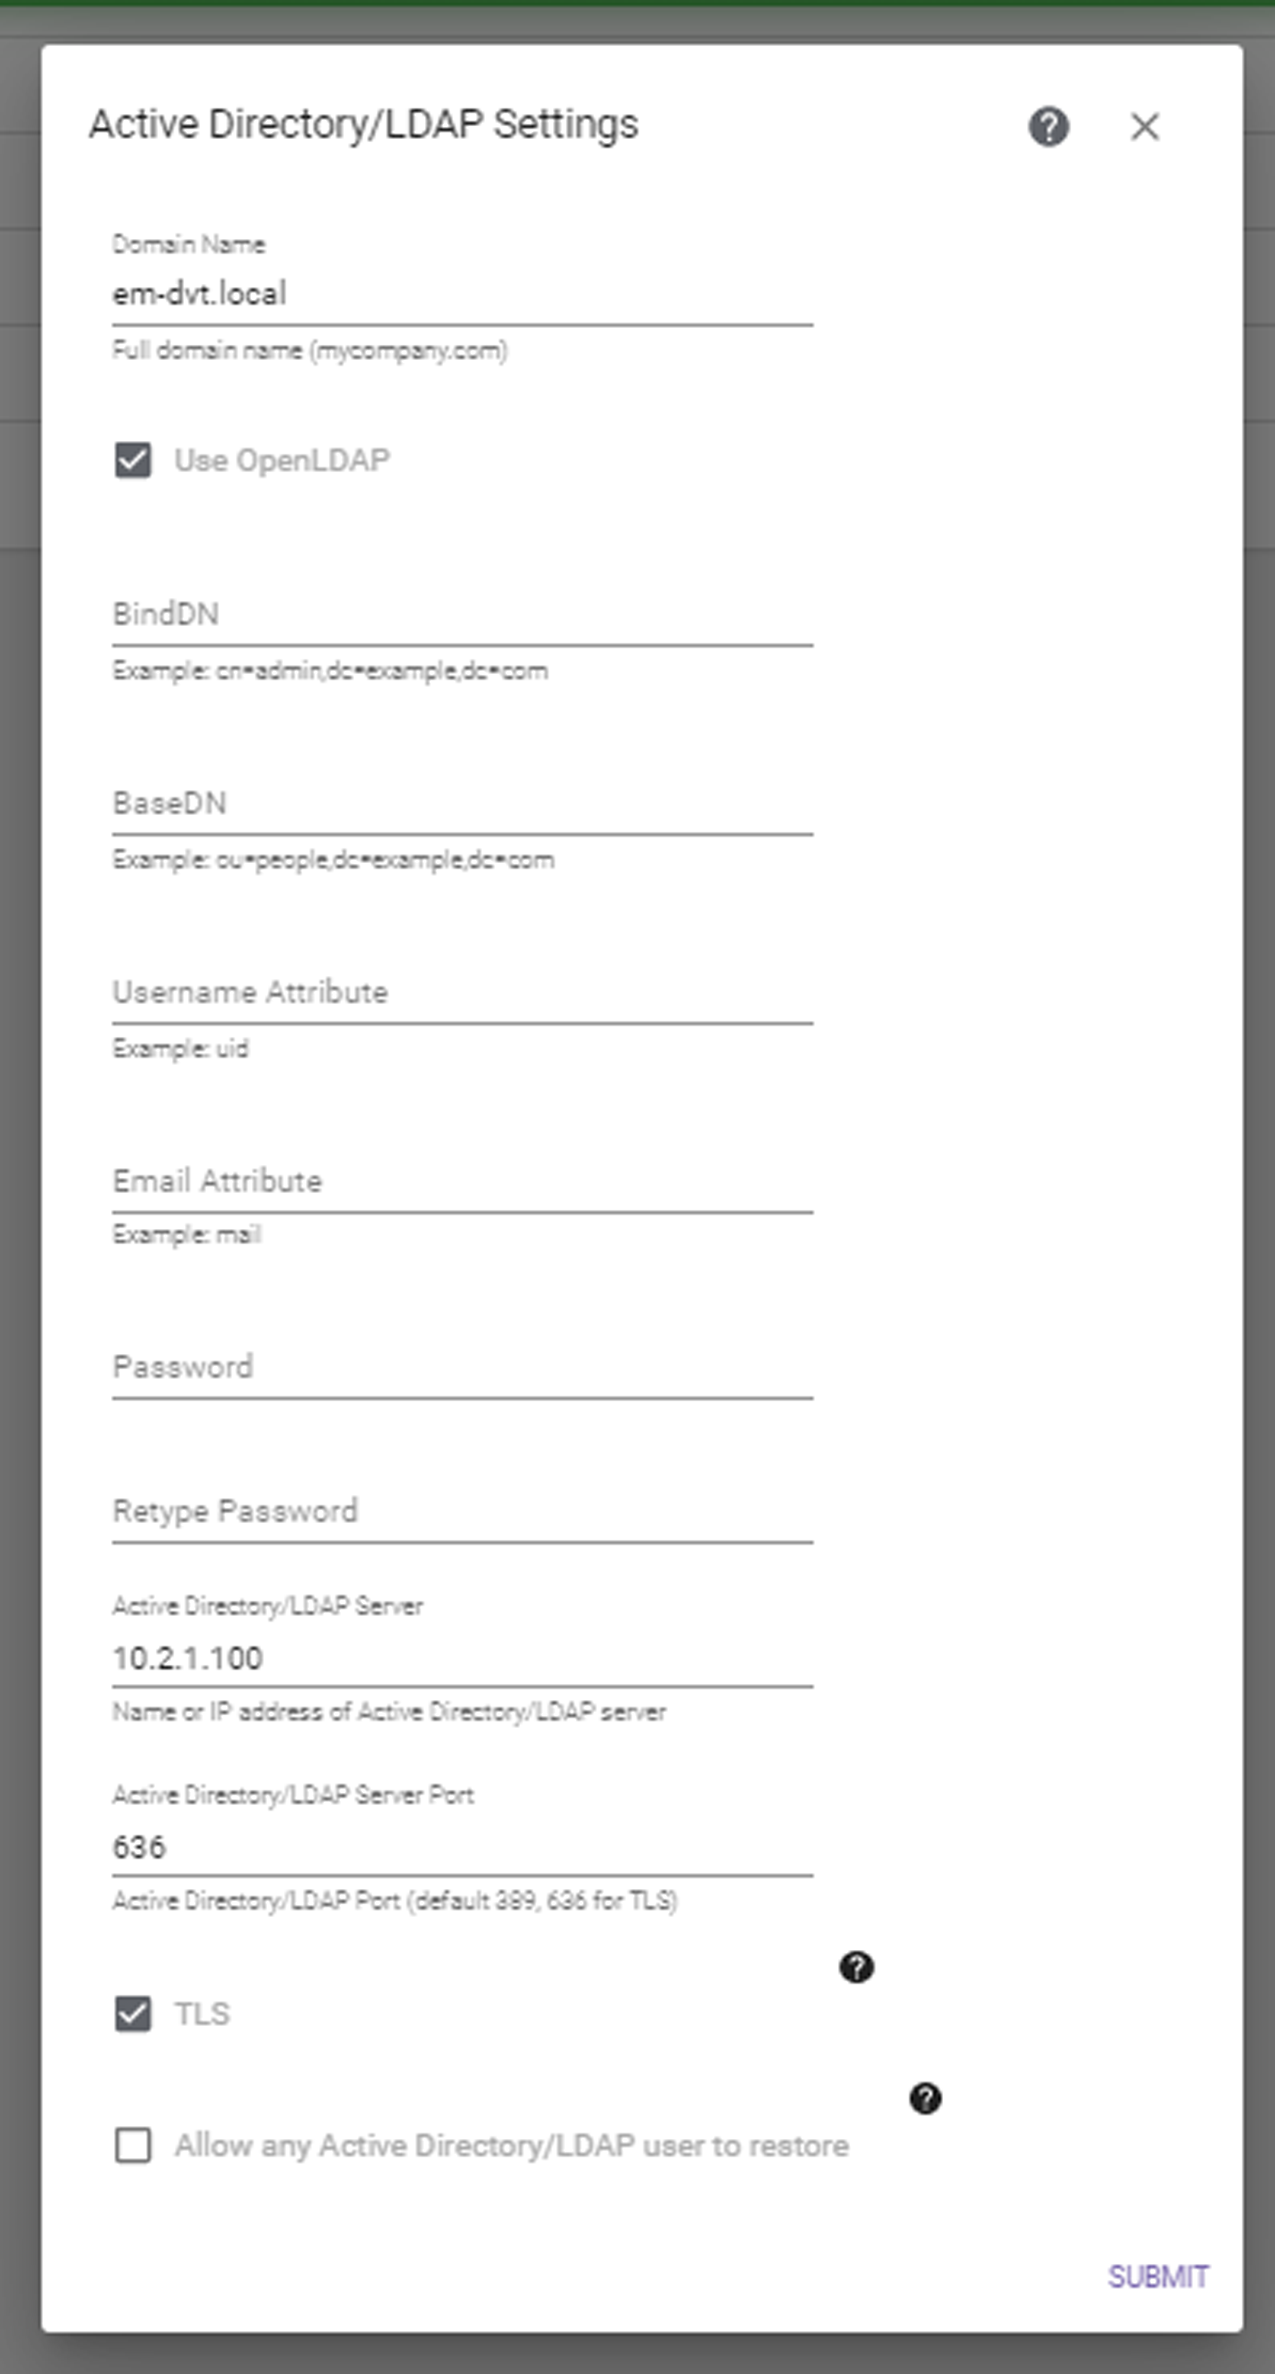
2. | Click Configure Active Directory / LDAP. The Active Directory / LDAP Settings dialog box displays. |
|
Figure 12 The Active Directory / LDAP Settings dialog box without Use OpenLDAP. |
3. | Enter the Active Directory Domain Name in the format Domain.com. |
4. | Select whether or not to Use OpenLDAP. If you select Use OpenLDAP, continue with Configure Active Directory / LDAP Using OpenLDAP. |
5. | Enter a User, in the format user@domain, and Password for a user authorized to make Active Directory / LDAP queries. |
6. | Enter the IP address or hostname for the Active Directory / LDAP Server. |
7. | If desired, modify the Active Directory / LDAP Server Port to connect to the Active Directory server. |
8. | Select or clear the TLS check box. If selected, the StorCycle solution uses secure SSL/TLS to connect to the server. Spectra Logic recommends enabling SSL/TLS. The StorCycle solution supports TLS 1.0, 1.1, and 1.2. |
9. | Select or clear Allow any Active Directory / LDAP user to restore. If selected, any Active Directory / LDAP user on the domain can restore files even if they are not configured as a StorCycle user. These users can only restore files using an HTML link. |
Note: | Restore only Active Directory / LDAP users count against the licensed user limit. |
If you selected Allow any Active Directory / LDAP user to restore, select whether to limit the amount of data an AD / LDAP user can restore each day and if selected, enter the daily limit. The daily limit is from midnight to midnight UTC.
10. | Click Submit to save the Active Directory / LDAP settings. |
If you selected Use OpenLDAP, the dialog box updates to display the OpenLDAP setting fields.
|
Figure 13 The Active Directory / LDAP Settings dialog box with Use OpenLDAP. |
1. | Enter the BindDN, for example cn=admin, dc=example, dc=com. |
2. | Enter the BaseDN, for example cn=people, dc=example, dc=com. |
3. | Enter the Username Attribute, for example the uid. |
4. | Enter the Email Attribute, for example mail. |
5. | Enter and verify the Password for the Username in Step 3. |
6. | Enter the IP address or hostname for the Active Directory / LDAP Server. |
7. | If desired, modify the Active Directory / LDAP Server Port to connect to the Active Directory server. |
8. | Select or clear the TLS check box. If selected, the StorCycle solution uses secure SSL/TLS to connect to the server. Spectra Logic recommends enabling SSL/TLS. The StorCycle solution supports TLS 1.0, 1.1, and 1.2. |
9. | Select or clear Allow any Active Directory / LDAP user to restore. If selected, any Active Directory / LDAP user on the domain can restore files even if they are not configured as a StorCycle user. These users can only restore files using an HTML link. |
Note: | Restore only Active Directory / LDAP users count against the licensed user limit. |
If you selected Allow any Active Directory / LDAP user to restore (not shown), select whether to limit the amount of data an AD / LDAP user can restore each day and if selected, enter the daily limit. The daily limit is from midnight to midnight UTC.
10. | Click Submit to save the Active Directory / LDAP settings. |
To clear Active Directory / LDAP Settings, click Clear Configuration on the Active Directory / LDAP Settings screen. A confirmation screen displays. Click Clear Config to confirm.