Use the instructions below to configure a new department.
Configure departments to manage cost accounting by department.
Use the instructions below to configure a new department.
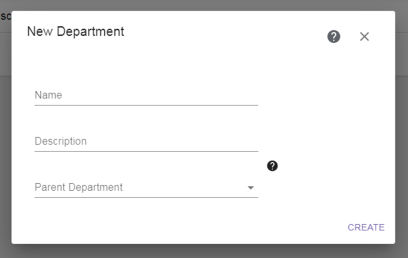
| 2. | Click New Department. The New Department dialog box displays. |
|
|
|
Figure 18 The New Department dialog box. |
| 3. | Enter a unique Name for the department. |
| 4. | If desired, enter a Description for the department. |
| 5. | If applicable, use the drop-down list to select the Parent Department to which this department belongs. |
| 6. | Click Submit to save the department configuration. |
| 7. | If necessary, repeat Step 2 through Step 6 to add additional departments. |
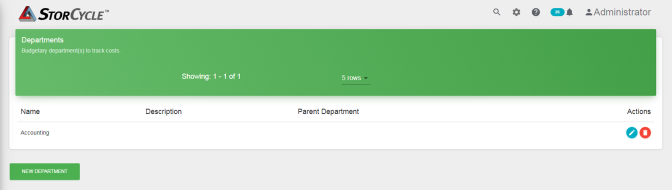
To edit a department, click Edit  next to the department on the Department screen (see Figure 17). Edit the Description and Parent Department as desired and click Update. If you want to change the name of a department, delete the department and then recreate it with the new name.
To delete a department, click the Delete  next to the department on the Department screen (see Figure 17). A confirmation screen displays. Click Delete to confirm the department deletion.
 in the toolbar and then select Departments. The Departments screen displays showing all departments currently configured in the software.