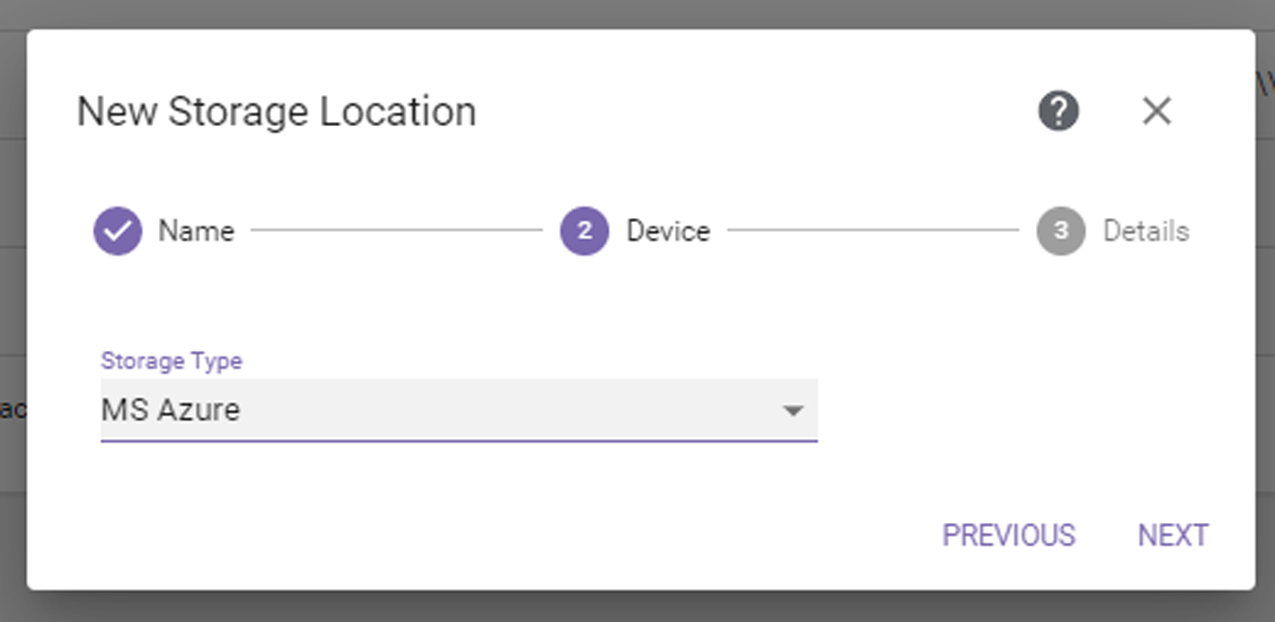
Figure 36 The New Storage Location MS Azure Device dialog box.
| Notes: l | To enter a Microsoft Azure Archive storage location, Enter Microsoft Azure Archive Storage Location Information. |
| l | Microsoft Azure storage locations can only be target locations. |
If you select the MS Azure storage type, the dialog box displays as shown:
|
|
|
Figure 36 The New Storage Location MS Azure Device dialog box. |
| 1. | Click Next. The MS Azure Storage Location Details dialog box displays. |
|
|
|
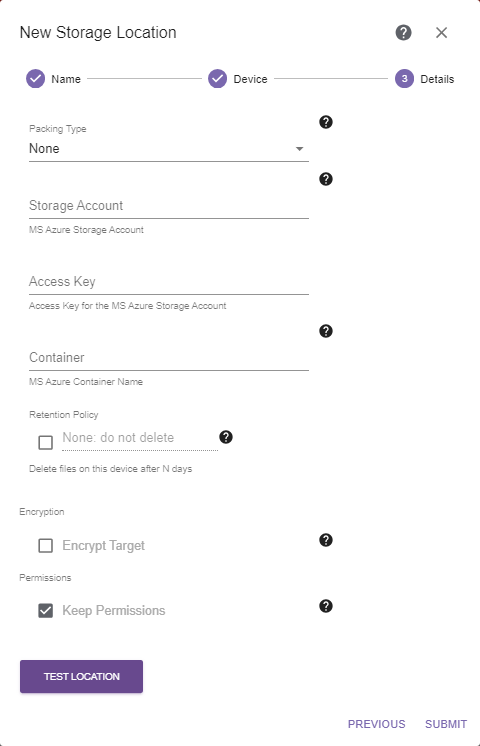
Figure 37 The New Storage Location MS Azure Details dialog box. |
| 2. | Select whether archived data should be packed into larger files for transfer, and, if so, which Packing Type to use. |
When migrating many small files, packing improves performance by reducing the total number of objects that are migrated and managed by the target system. Individual files in packs are tracked by StorCycle, and users may restore a single or multiple individual files which are stored in a pack.
StorCycle packs can be accessed outside of the StorCycle solution using a tool to unzip or untar the packed file.
| Notes: l | Spectra Logic recommends using packing when a majority of files are smaller than 5 MiB and no files are larger than 10 GiB. |
| l | Spectra Logic recommends using ZIP for Windows clients and TAR for UNIX clients. |
| l | Files are added to packs until the pack reaches 10,000 files or reaches 10 GiB of data. |
| l | Files are never split between packs. |
| l | Up to five packs can be created at the same time. |
| 3. | Enter a Microsoft Azure Storage Account for the container to be used for data storage. |
| 4. | Enter the Access Key for the Storage Account. |
| 5. | Enter the name of the Container to be used for data storage. |
|
CAUTION |
Make sure the storage account is configured for blob versioning to avoid migrate / store failures if a file with the same name already exists in the container. |
The container name must adhere to the Microsoft Azure naming requirements. If the container does not exist, it is created.
Container names have the following restrictions:
| • | Container names must comply with DNS naming conventions. |
| • | Container names may contain lower case letters, numbers and single dashes. |
| • | Dashes must be preceded by and followed by letters or numbers. |
| • | Bucket names must be at least 3 and no more than 63 characters long. |
| 6. | If desired, select the Retention Policy check box and enter or select the desired number of days to retain files on this storage location before the StorCycle solution automatically deletes the files for compliance or capacity recovery. Clear the Retention Policy check box to keep files permanently. See Retention Policy Best Practices for more information. |
| Note: | Retention policies are only supported for data center and enterprise licenses. See Licensing for more information. |
| 7. | If desired, select the Encrypt Target check box to encrypt data sent to this target location. Clear the Encrypt Target check box if you do not want data sent to the target encrypted. See Enable Encryption for more information. |
| Note: | Only users with a Crypto Officer role can enable or disable encryption. |
| 8. | If desired, select Keep Permissions to preserve file permissions on the storage location. |
| 9. | Click Test Location to verify that the server can connect to the storage location. If the StorCycle solution does not return a check mark indicating it can communicate with the storage location, you must resolve the error before submitting the location. |
| 10. | Click Submit to save the storage location. |