Figure 33 The New Storage Location S3 Device dialog box.
| Notes: l | Data on S3 source storage can only be migrated / stored to a BlackPearl storage location. |
| l | Files migrated / stored from an S3 source to a BlackPearl storage location can only be restored to a Spectra or Non-Spectra NAS storage location. |
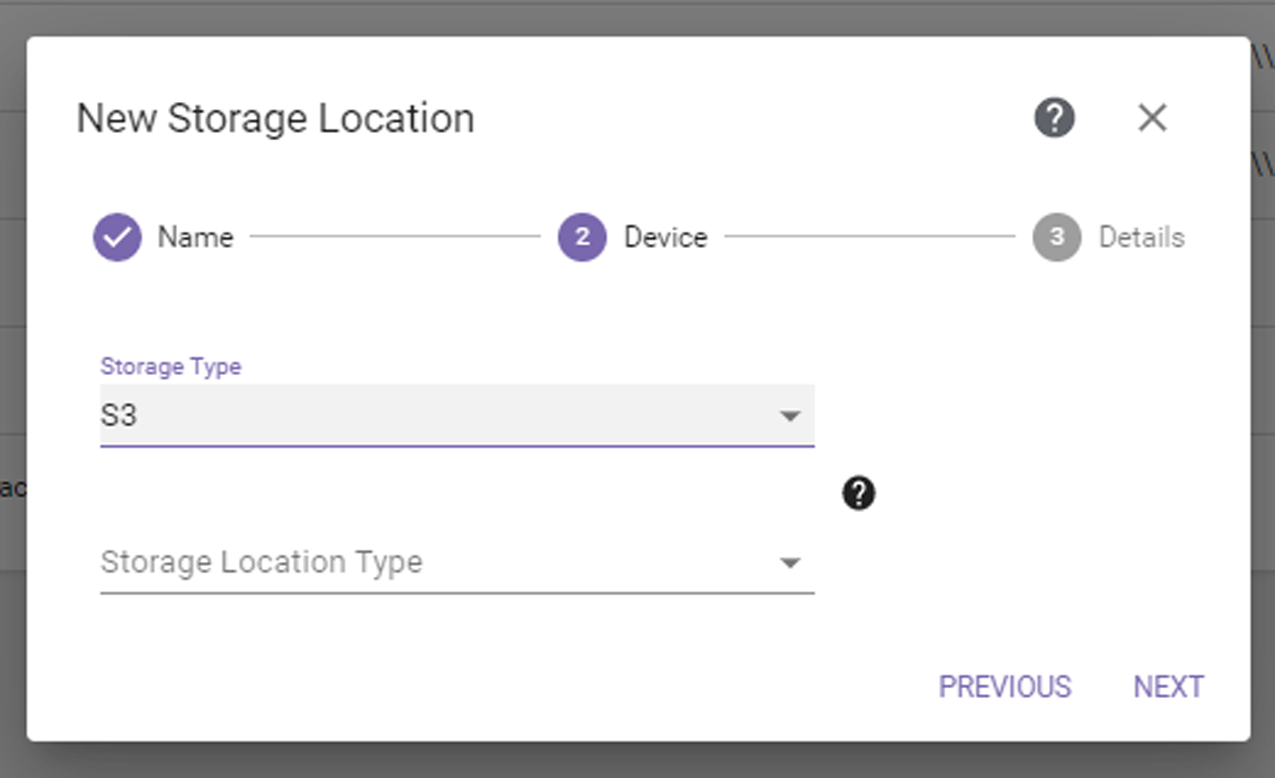
If you select the S3 storage type, the dialog box updates to display the following fields:
|
|
|
Figure 33 The New Storage Location S3 Device dialog box. |
| 1. | For Storage Location Type, select whether the storage location will act as a Source or a Target. |
| 2. | Click Next. The S3 Storage Location Details dialog box displays. The options that display are different if you are creating source or target storage. First you configure settings common to both types of storage, then use either the source or target storage instructions depending on the type of storage you are configuring. |
|
|
|
|
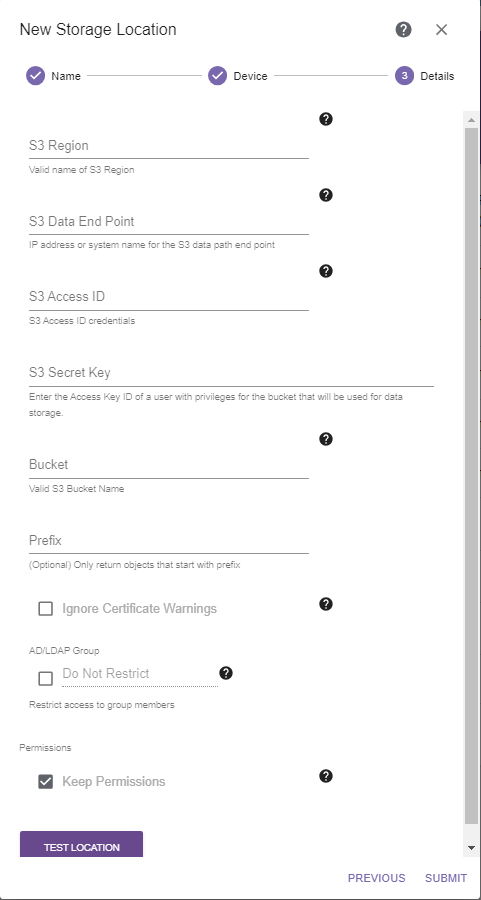
Figure 34 The New Storage Location S3 Source Details dialog box. |
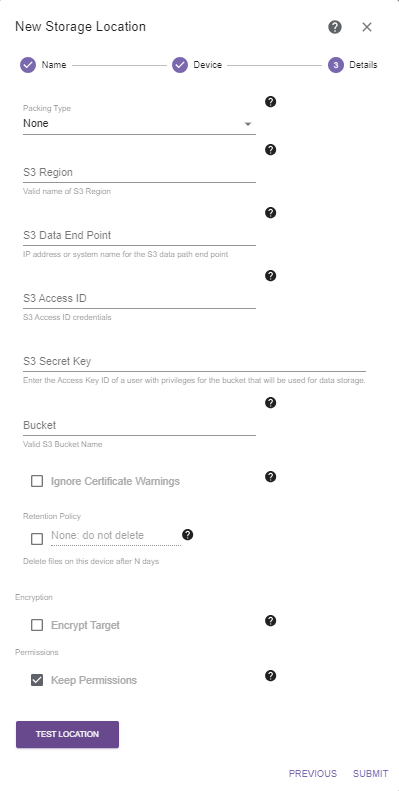
Figure 35 The New Storage Location S3 Target Details dialog box . |
| 1. | Enter an S3 Region or an S3 Data End Point in the format xxx.xxx.xxx.xxx:port (port is optional). For AWS specify S3 Region only. For non-AWS, specify and endpoint with HTTP or HTTPS. |
| 2. | Enter the S3 Access ID of a user with credentials for the S3 cloud and the bucket that will be used for data storage. |
| 3. | Enter the S3 Secret Key associated with the S3 Access ID. |
| 4. | Enter the name of the Bucket to be used for data storage. |
|
CAUTION |
Make sure the target bucket is configured for versioning to avoid a migrate / store failing if a file with the same name already exists in the Bucket. |
The bucket name must adhere to the Amazon S3 naming requirements. If the bucket does not exist, it is created.
S3 names have the following restrictions:
| • | Bucket names must comply with DNS naming conventions. |
| • | Bucket names must be at least 3 and no more than 63 characters long. |
| • | Bucket names must be a series of one or more labels. Adjacent labels are separated by a single period (.). |
| • | Bucket names can contain lowercase letters (a-z), numbers (0-9), and hyphens. You cannot use a hyphen at the beginning or end of a label. |
| • | Bucket names cannot contain uppercase characters or underscores. |
| • | Bucket names cannot be formatted as an IP address. |
| 5. | If desired, select Ignore Certificate Warnings to indicate that this is a trusted target and security certificate warnings should be ignored, even if it has a self-signed or missing security certificate. |
| 6. | Continue with either the source storage or target storage instructions below: |
| • | Steps for Source Storage |
-OR-
| • | Steps for Target Storage |
| 1. | If desired, enter a Prefix. Only objects that start with the prefix are considered for scans or migrate / store projects. |
| 2. | If desired, select AD / LDAP Group and enter an AD / LDAP group to restrict access to scan, migrate / store, and restore jobs, as well as file listings associated with the source, to members of the designated group and administrators. If you select this option and AD / LDAP is not configured or the entered user group does not exist, access is restricted to administrators. See Storage Location Security for more information. |
| 3. | Continue with Final Steps for Both Storage Types. |
| 1. | Select whether archived data should be packed into larger files for transfer, and which Packing Type to use. When migrating many small files, packing improves performance by reducing the total number of objects that are migrated and managed. This also reduces the total size of the database. Individual files in packs are tracked by StorCycle, and users may restore a single or multiple individual files which are stored in a pack. StorCycle packs can be accessed outside of the StorCycle solution using a tool to unzip or untar the packed file. |
| Notes: l | Spectra Logic recommends using packing when a majority of files are smaller than 5 MiB and no files are larger than 10 GiB. |
| l | Spectra Logic recommends using ZIP for Windows clients and TAR for UNIX clients. |
| l | Files are added to packs until the pack reaches 10,000 files or reaches 10 GiB of data. |
| l | Files are never split between packs. |
| l | Up to five packs can be created at the same time. |
| 2. | If desired, select Retention Policy and enter or select the desired number of days to retain files on this storage location before the StorCycle solution automatically deletes the files for compliance or capacity recovery. Clear the Retention Policy check box to keep files permanently. See Retention Policy Best Practices for more information. |
| Note: | Retention policies are only supported for data center and enterprise licenses. See Licensing for more information. |
| 3. | If desired, select Encrypt Target to encrypt data sent to this target location. Clear the Encrypt Target check box if you do not want data sent to the target encrypted. See Enable Encryption for more information. |
| Note: | Only users with a Crypto Officer role can enable or disable encryption. |
| 4. | Continue with Final Steps for Both Storage Types. |
| 1. | If desired, select Keep Permissions to preserve file permissions on the storage location. |
| 3. | Click Submit to save the storage location. |