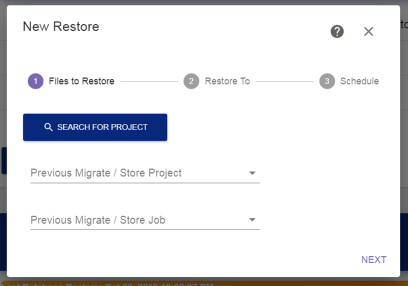
Figure 88 The Files to Restore screen of the Restore wizard.
The Files to Restore screen of the Restore wizard allows you to select from which migrate / store project to restore files.
|
IMPORTANT |
If storage locations use storage location security, The restore wizard will only display projects associated with source storage locations configured with an AD / LDAP group to which you are a member. See Storage Location Security for more information. |
|
|
|
Figure 88 The Files to Restore screen of the Restore wizard. |
| • | Click Search for Project to open the Catalog Search Dialog box . |
| • | Use the drop down fields to Select the Project Manually. |
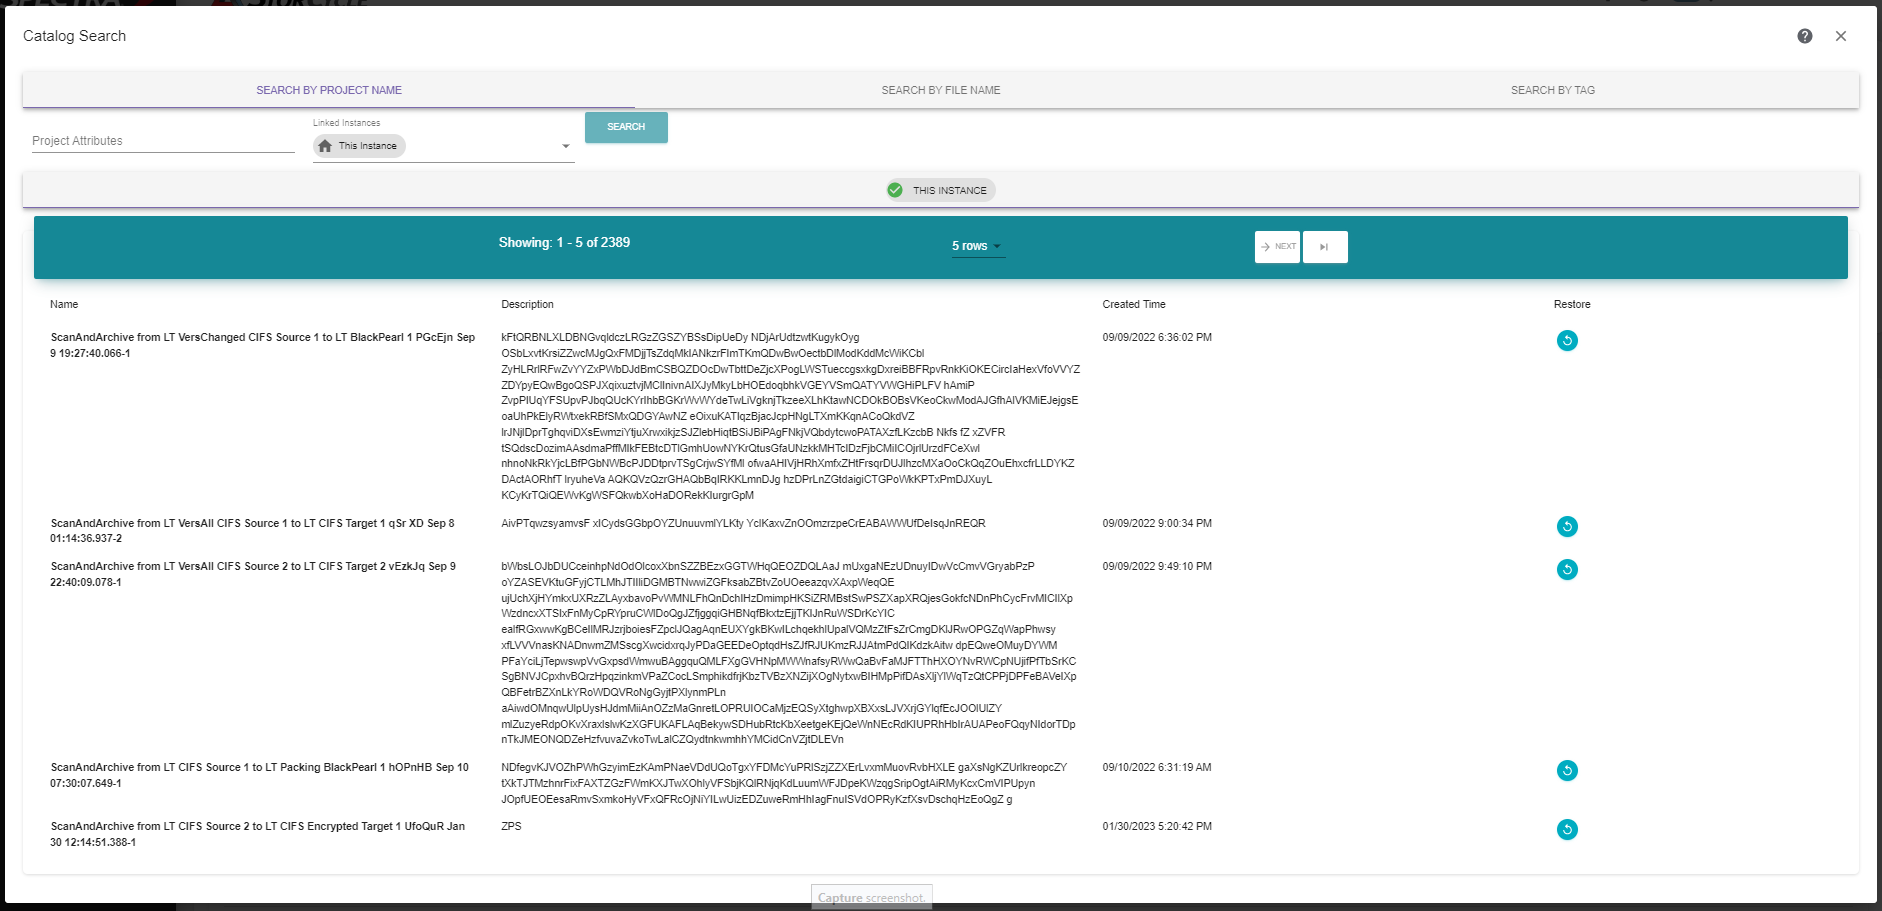
The Catalog Search dialog box allows you to search for a project.
|
|
|
Figure 89 The Search by Project Name tab of the Catalog Search dialog box. |
Select the tab indicating how you want to search:
| 1. | If applicable, select which StorCycle instances you want to search. The default is this instance only. See Configure Linked Instances for information on configuring linked instances. |
| 2. | In the Project Attributes field, enter the full or partial project name or description, and click Search. |
The tab for each linked instance included in the search displays the number of matches found. Select a tab to see all migrate / store jobs executed by a project with a name or description containing the search string.
| 3. | Click Restore  next to the job from which you want to restore files. next to the job from which you want to restore files. |
| 4. | The user interface returns to the Restore wizard with the correct Previous Migrate / Store Project and Previous Migrate / Store Job selected. |
| Note: | If the job is on a linked instance, you will need to log into the linked StorCycle solution and continue creating the restore project on that instance. Files can only be restored to storage locations configured in the linked instance. |
| 5. | Continue with Select Files to Restore. |
|
|
|
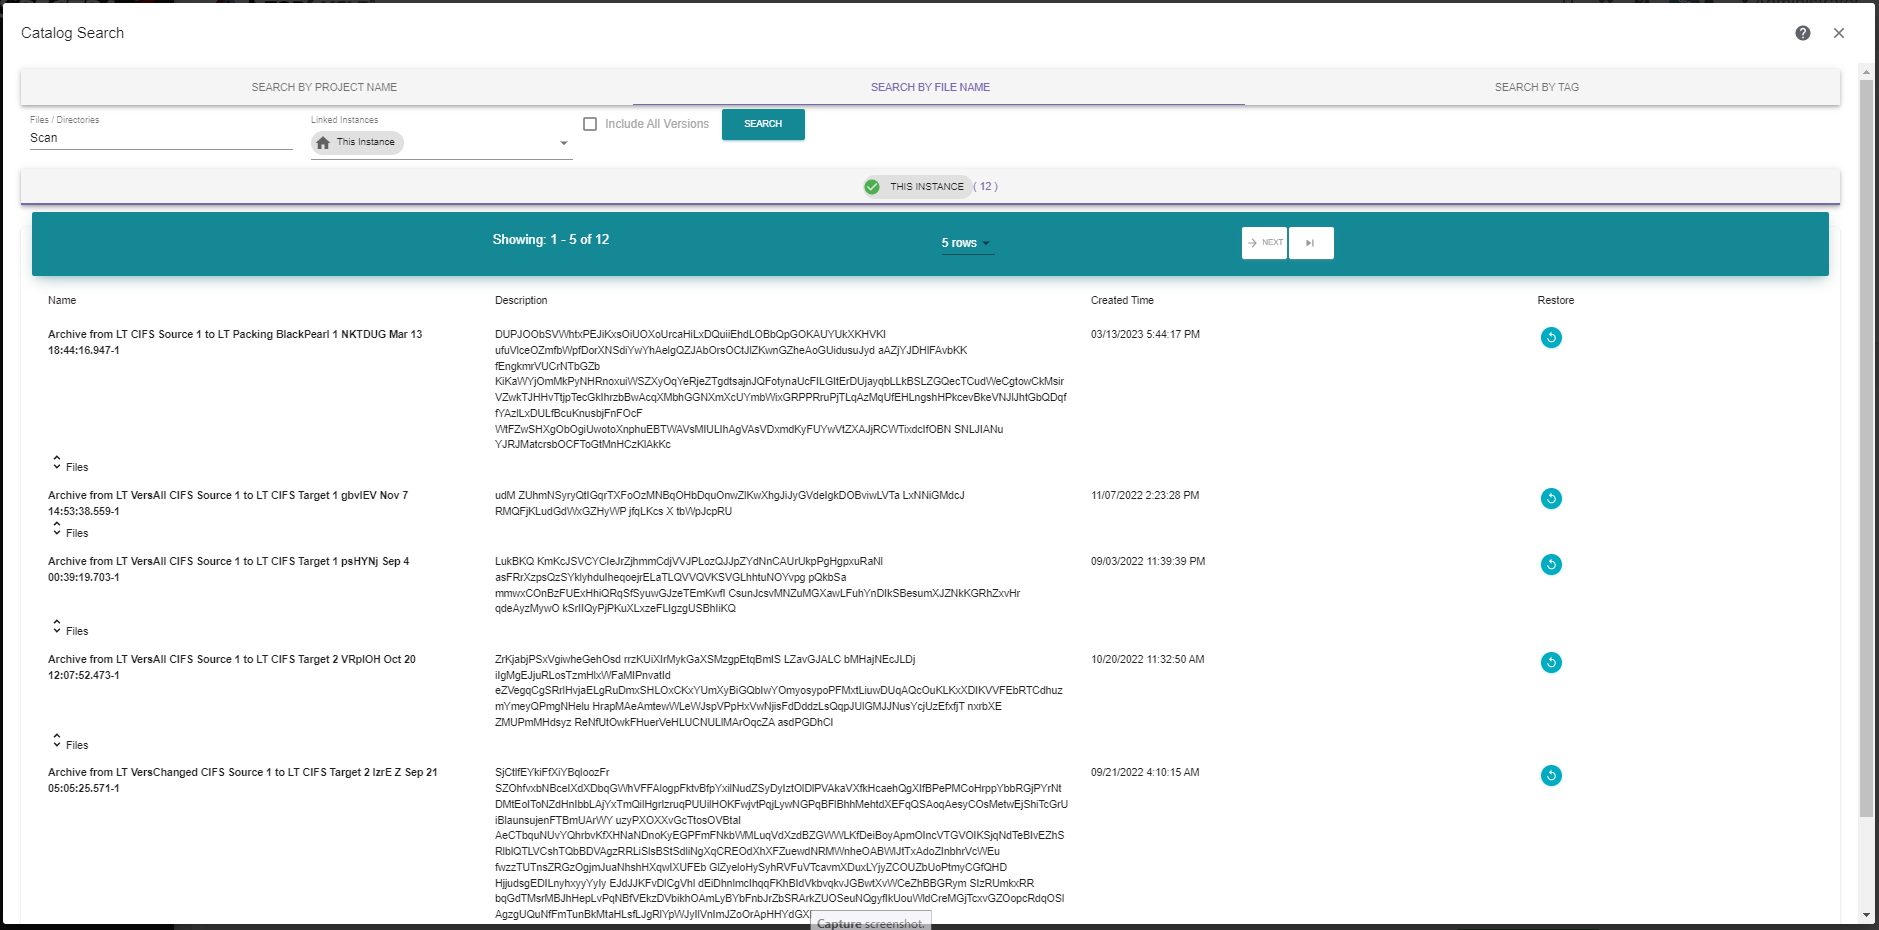
Figure 90 The Search by File Name tab of the Catalog Search dialog box. |
| 1. | If applicable, select which StorCycle instances you want to search. The default is this instance only. See Configure Linked Instances for information on configuring linked instances. |
| 2. | If applicable, select whether to Include All Versions. See Versioning for information on versioned sources. |
| Note: | This setting can be toggled after searching for files. |
| 3. | In the Files / Directories field, enter the full or partial file or directory name, and click Search. |
If you selected one or more linked instances, a tab for each linked instance included in the search displays the number of matches found.
If you selected Include All Versions, the screen displays a Latest Version tab and a Versioned Files tab for this instance of StorCycle software. The Latest Version tab displays the latest version of all files. The Versioned Files tab displays all versions of versioned files including the latest version with a code appended to the file name that indicates the date and time that the file was migrated / stored in the format yyyymmddhhmmss using a 24-hour clock.
Select a tab to display all migrate / store jobs containing a file or directory with a name containing the search string.
| Notes: l | Non-versioned files do not display on the Versioned Files tab. |
| l | Linked Instances only display the latest version of files. |
| l | When a versioned file is restored, the data and time information is removed from the file name. |
| l | If a job is restored from a target with packing enabled and which contains a versioned file which has been deleted due to keep XX versions, the StorCycle solution does not include the deleted file in the restore, even if it still exists in a pack. The deleted version does not exist in the StorCycle database and the restore job completes without warnings or errors. |
| 4. | Click Restore next to the job from which you want to restore files. Alternatively, expand the project and select a single file to restore. |
| 5. | The user interface returns to the Restore wizard with the correct Previous Migrate / Store Project and Previous Migrate / Store Job selected. Or, if you selected a single file, the information for the single file is automatically populated. |
| Note: | If the job is on a linked instance, you will need to log into the linked StorCycle solution and continue creating the restore project on that instance. Files can only be restored to storage locations configured in the linked instance. |
| 6. | Continue with Select Files to Restore. |
|
|
|
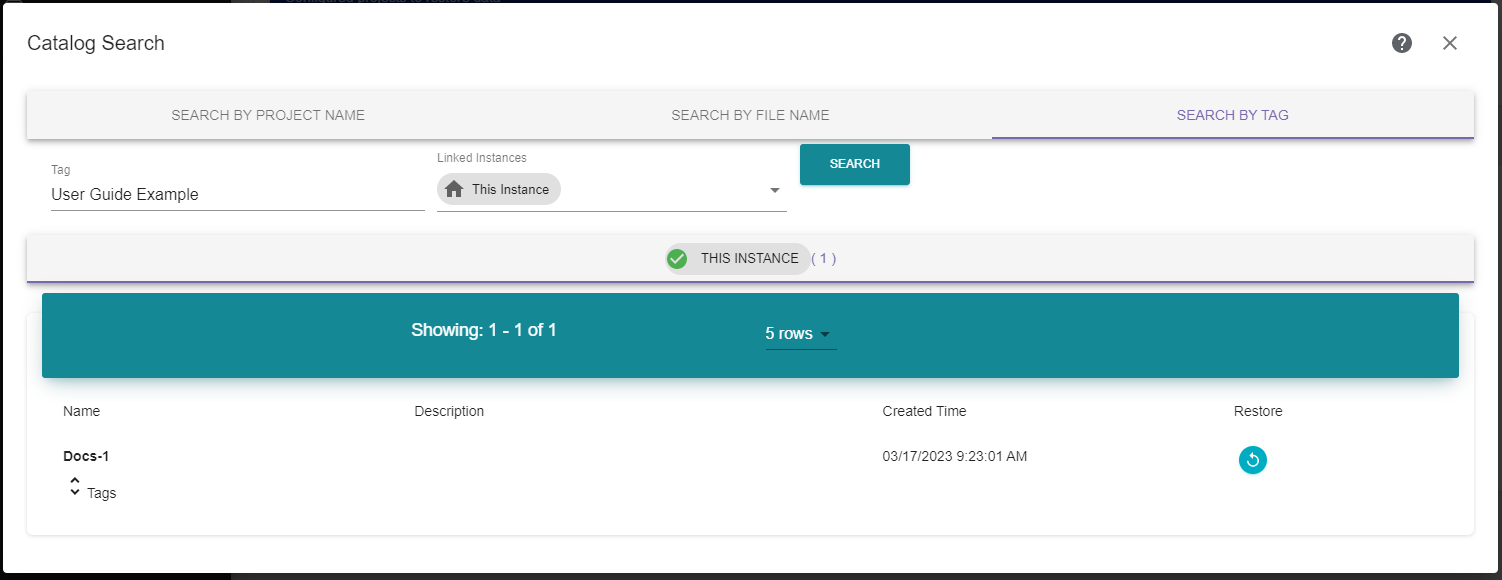
Figure 91 The Search by Tag tab of the Catalog Search dialog box. |
| 1. | If applicable, select which StorCycle instances you want to search. The default is this instance only. See Configure Linked Instances for information on configuring linked instances. |
| 2. | In the Tag field, enter a full or partial tag, and click Search. |
The tab for each linked instance included in the search displays the number of matches found. Select a tab to see all migrate / store jobs with a tag containing the search string.
| 3. | Click Restore next to the job from which you want to restore files. |
| 4. | The user interface returns to the Restore wizard with the correct Previous Migrate / Store Project and Previous Migrate / Store Job selected. |
| Note: | If the job is on a linked instance, you will need to log into the linked StorCycle solution and continue creating the restore project on that instance. Files can only be restored to storage locations configured in the linked instance. |
| 5. | Continue with Select Files to Restore. |
| 1. | From the Previous Migrate / Store Project drop-down, select a previously configured project which executed the job from which you want to restore files. See Migrate or Store Data . |
| 2. | From the Previous Migrate / Store Job drop-down, select the previously executed job from which you want to restore files. |
| Note: | If the project was deleted manually or because of retention policy, the drop-down for Previous Migrate / Store Job will be empty. |
| 3. | Continue with Select Files to Restore. |