Enter Amazon S3 Glacier Storage Location Information

Notes: 

To enter an S3 standard tier storage location, see Enter S3 Storage Location Information.
Amazon S3 Glacier storage locations can only be target locations.

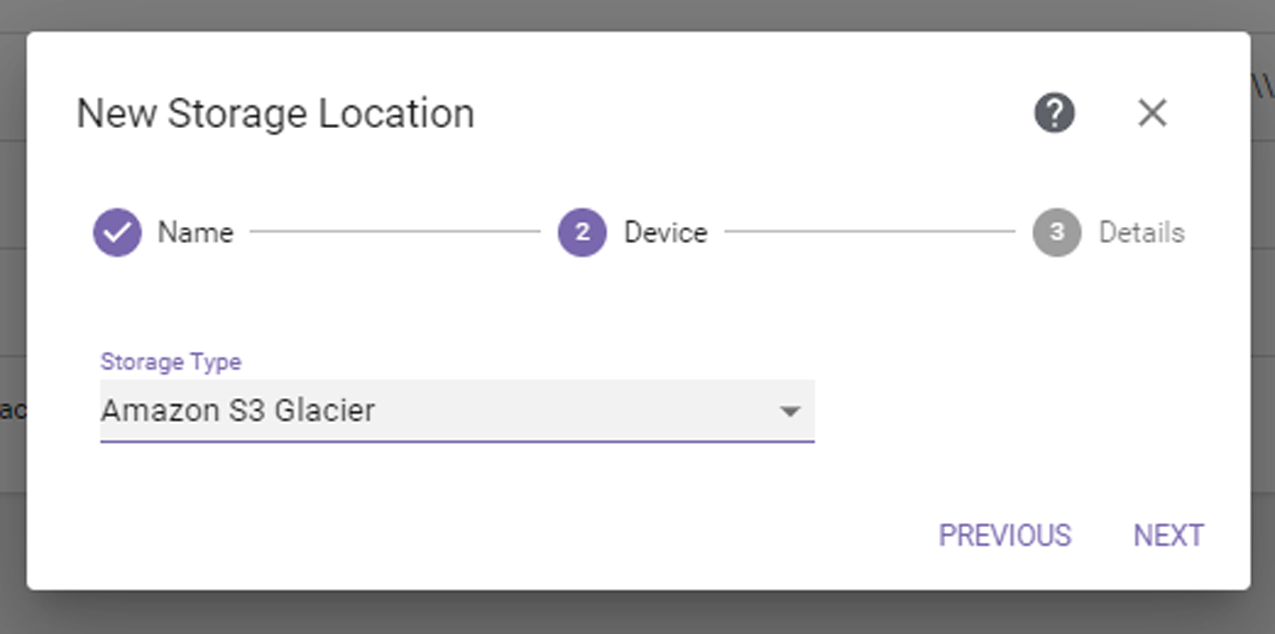
If you select the Amazon S3 Glacier storage type, the dialog box displays as shown:

Figure 56 The New Storage Location Amazon S3 Glacier Device dialog box.

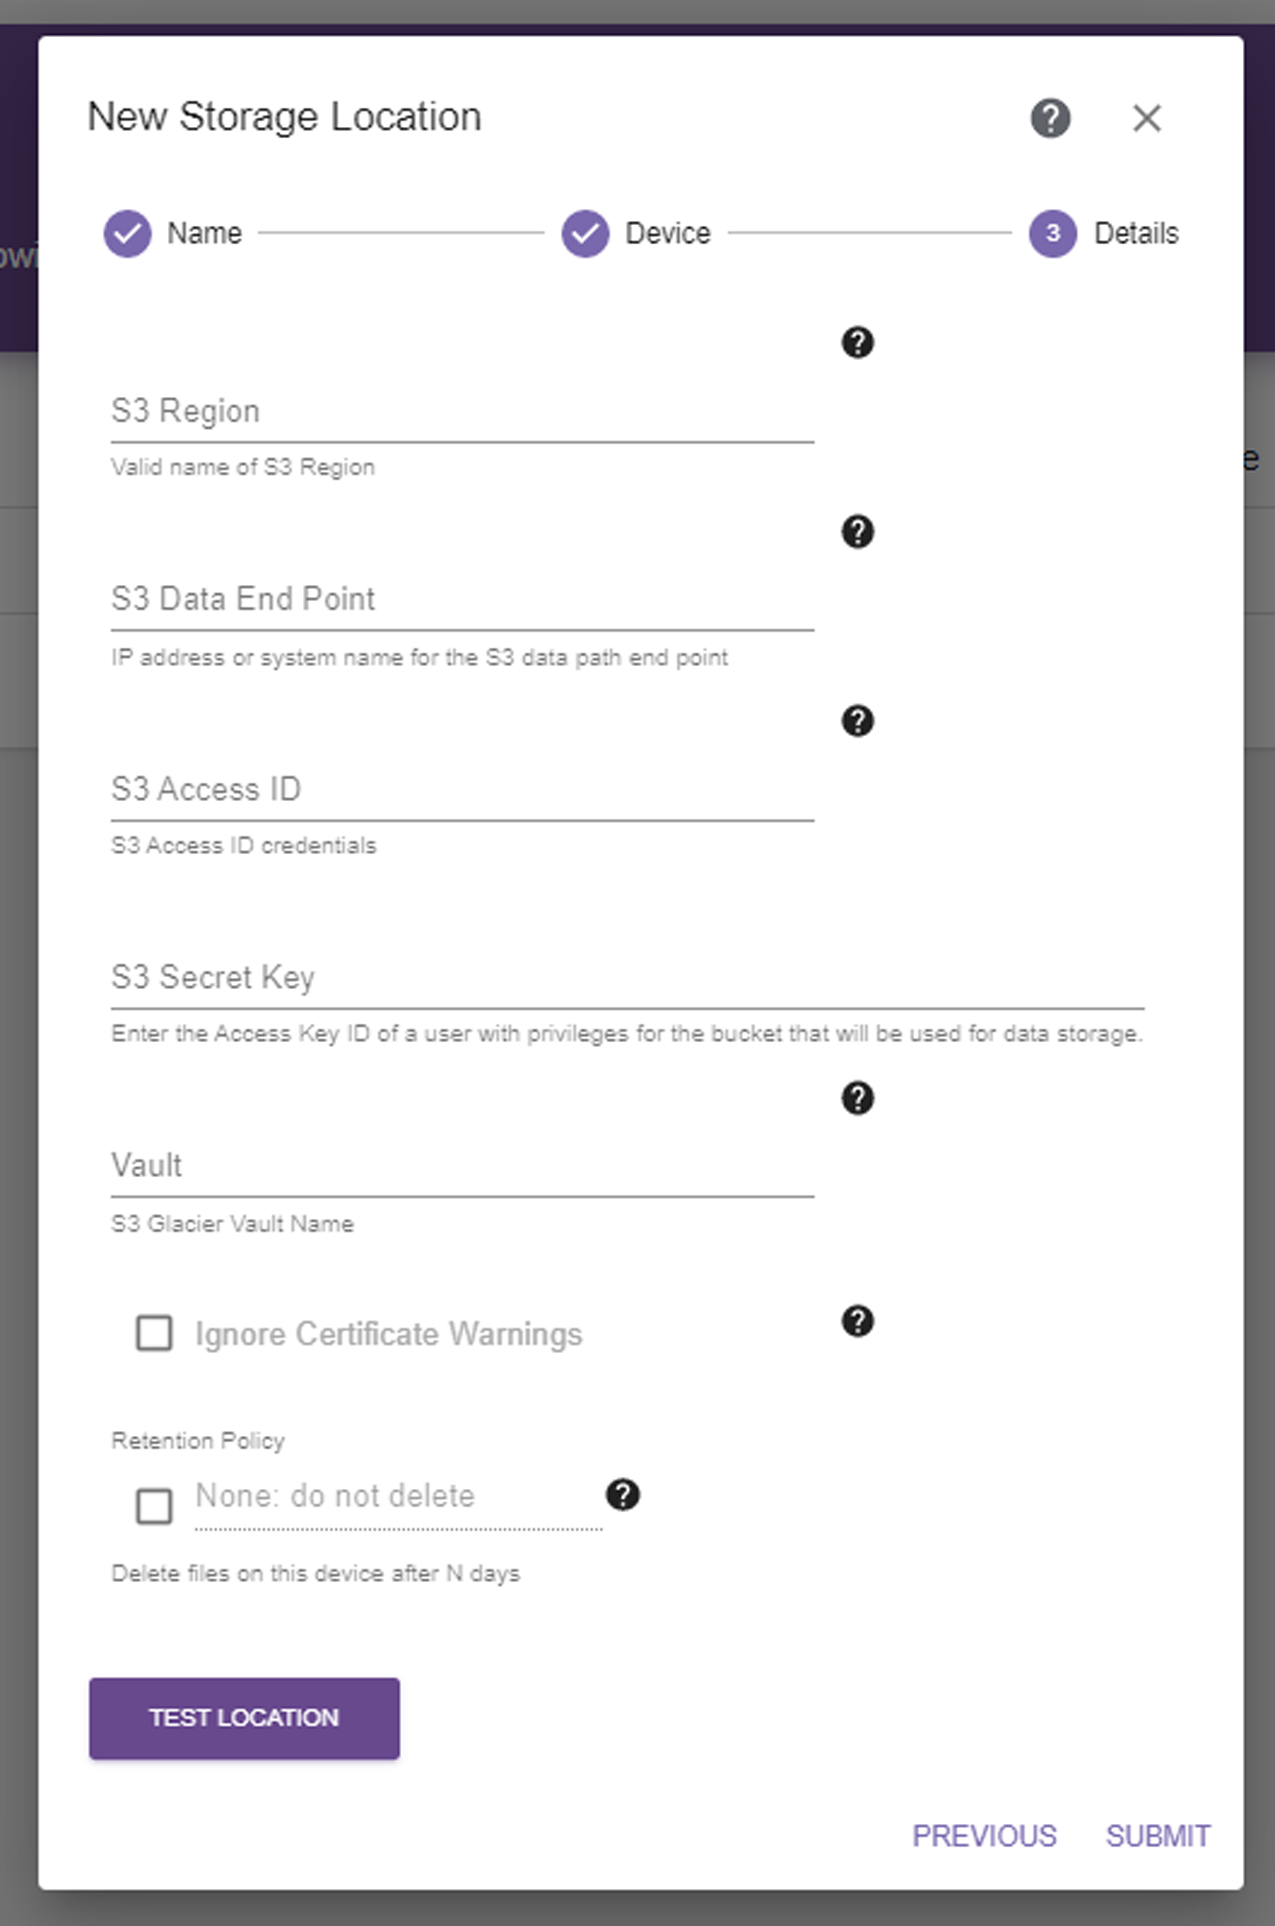
1. Click Next. The Amazon S3 Glacier Storage Location Details dialog box displays.

Figure 57 The New Storage Location Amazon S3 Glacier Details dialog box.

2. Enter an S3 Region or an S3 Data End Point in the format xxx.xxx.xxx.xxx:port (port is optional). For AWS specify S3 Region only.
3. Enter the S3 Access ID of a user with credentials for the Amazon S3 cloud and the vault that will be used for data storage.
4. Enter the S3 Secret Key associated with the S3 Access ID.
5. Enter the name of the S3 Storage Vault to be used for data storage. If the vault does not exist, it is created.

Vault names have the following restrictions:

Vault names can be between 1 and 255 characters long.
Vault names can contain lowercase letters (a-z), uppercase letters (A-Z), numbers (0-9), hyphens (-), underscores (_), and periods (.).

Vault names must be unique within an account and the AWS Region in which the vault is being created.

6. If desired, select Ignore Certificate Warnings to indicate that this is a trusted target and security certificate warnings should be ignored, even if it has a self-signed or missing security certificate.
7. If desired, select the Retention Policy check box and enter or select the desired number of days to retain files on this storage location before the StorCycle solution automatically deletes the files for compliance or capacity recovery. Clear the Retention Policy check box to keep files permanently. See Retention Policy Best Practices for more information.
Note: Retention policies are only supported for data center and enterprise licenses. See Licensing for more information.
8. Click Test Location to verify that the server can connect to the storage location. If the StorCycle solution does not return a check mark indicating it can communicate with the storage location, you must resolve the error before submitting the location.
9. Click Submit to save the storage location.
10. If necessary, repeat these steps, starting with Step 2 in Configuring Storage to configure additional storage locations.