IMPORTANT |
See “Understanding Spectra Advanced Bucket Management Concepts” in the Spectra BlackPearl Converged Storage System User Guide for information about configuring data placement policies for a bucket to meet your archiving needs and for instructions to gather the information to configure the storage location. |
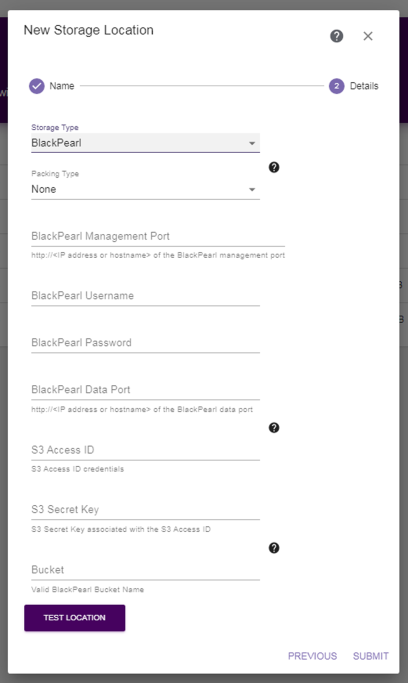
If you select the BlackPearl storage type, the dialog box updates to display the following fields:
|
Figure 35 The New Storage Location dialog box with BlackPearl specific fields. |
Notes:
• | Spectra Logic recommends using packing when a majority of files are smaller than 100 KB and no files are larger than 10 GB. |
• | Spectra Logic recommends using ZIP for Windows clients and TAR for UNIX clients. |
• | Files continue to be added to packs until the pack reaches 10,000 files or goes beyond 10 GB of data. |
• | Up to five packs can be created at the same time. |
2. | Enter the IP address or hostname for the BlackPearl Management Port. Include http://. |
3. | Enter the Username of a BlackPearl user with Login user access as well as Monitor and/or Administrator user access, or if the BlackPearl system has Active Directory configured, an Active Directory administrator. |
4. | Enter the Password associated with the username entered above. |
5. | Enter an IP address or hostname for the BlackPearl Data Port. Include http://. |
6. | Enter the S3 Access ID of a user with credentials for the BlackPearl system and the bucket that will be used for data storage. |
7. | Enter the S3 Secret Key associated with the S3 Access ID entered above. |
8. | Enter the name of the Bucket to be used for data storage. If the bucket does not exist, it is created. |
CAUTION |
Make sure the target bucket uses a data policy with versioning enabled to avoid migrate/ store jobs failing if a file with the same name already exists in the Bucket. |
Note: | Bucket Names must meet the following criteria: |
• | Bucket names must be at least 1 character long and not more than 63 characters long. |
• | Bucket names must not contain special characters such as @, $, #, %, {, }, or |. |
10. | Click Submit to save the storage location. |
11. | If necessary, repeat these steps, starting with Step 2 in Configuring Storage to configure additional storage locations. |