Enter BlackPearl Storage Location Information

IMPORTANT 

See “Understanding Spectra Advanced Bucket Management Concepts” in the Spectra BlackPearl Converged Storage System User Guide for information about configuring data placement policies for a bucket to meet your archiving needs and for instructions to gather the information to configure the storage location.

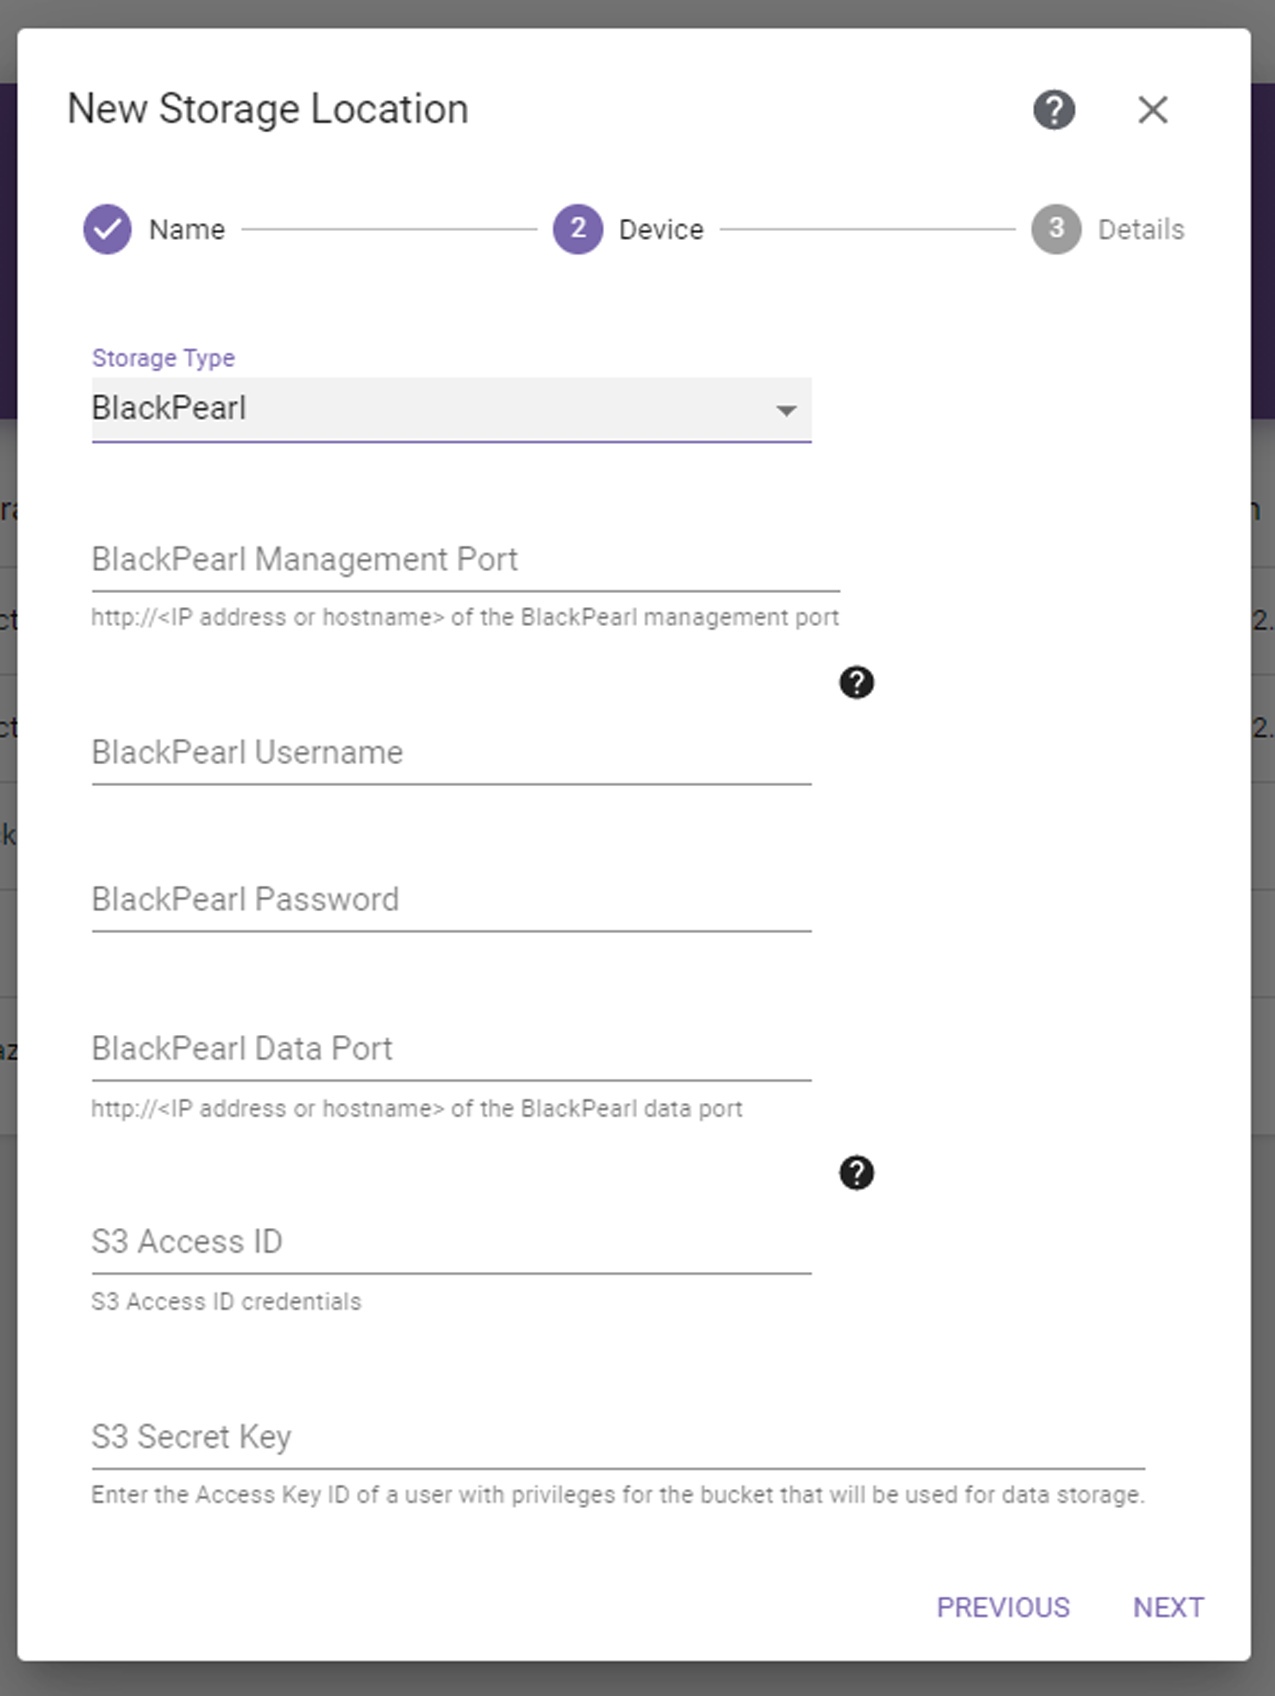
If you select the BlackPearl storage type, the dialog box updates to display the following:

Figure 44 The New Storage Location BlackPearl Device dialog box.

1. Enter the IP address or hostname for the BlackPearl Management Port. Include http://.
2. Enter the Username of a BlackPearl user with Login user access as well as Monitor and/or Administrator user access, or if the BlackPearl system has Active Directory configured, an Active Directory administrator.
3. Enter the Password associated with the username entered above.
4. Enter an IP address or hostname for the BlackPearl Data Port. Include http://.
5. Enter the S3 Access ID of a user with credentials for the BlackPearl system and the bucket that will be used for data storage.
6. Enter the S3 Secret Key associated with the S3 Access ID entered above.
7. Click Next. The BlackPearl Storage Location Details dialog box displays.

Figure 45 The New Storage Location BlackPearl Details dialog box (target shown).

8. Select whether archived data should be packed into larger files for transfer, and, if so, which Packing Type to use. Packing reduces the number of objects sent to a BlackPearl system and larger files transfer to a BlackPearl system faster than multiple smaller files.

Notes: 

Spectra Logic recommends using packing when a majority of files are smaller than 5 MiB and no files are larger than 10 GiB.
Spectra Logic recommends using ZIP for Windows clients and TAR for UNIX clients.
Files continue to be added to packs until the pack reaches 10,000 files or goes beyond 10 GiB of data.
Files are never split between packs.
Up to five packs can be created at the same time.
9. Enter the name of the Bucket to be used for data storage. If the bucket does not exist, it is created.

CAUTION 

Make sure the target bucket uses a data policy with versioning enabled to avoid migrate / store jobs failing if a file with the same name already exists in the bucket.

Note: Bucket names must meet the following criteria:
Bucket names must be at least 1 character long and not more than 63 characters long.
Bucket names must not contain special characters such as @, $, #, %, {, }, or |.
10. If the bucket already exists, you can select Keep Existing or Use Default Data Policy or View Existing Bucket Policy to see the data policy assigned to the bucket.

If the bucket is new, you can select Keep Existing or Use Default Data Policy or a listed data policy.

11. If desired, select the Retention Policy check box and enter or select the desired number of days to retain files on this storage location before the StorCycle solution automatically deletes the files for compliance or capacity recovery. Clear the Retention Policy check box to keep files permanently. See Retention Policy Best Practices for more information.
Note: Retention policies are only supported for data center and enterprise licenses. See Licensing for more information.
12. If desired, select the Encrypt Target check box to encrypt data sent to this target location. Clear the Encrypt Target check box if you do not want data sent to the target encrypted. See Enable Encryption for more information.
Note: Only Crypto Officer users can enable encryption.
13. Click Test Location to verify that the server can connect to the storage location. If the StorCycle solution does not return a check mark indicating it can communicate with the storage location, you must resolve the error before submitting the location.
14. Click Submit to save the storage location.
15. If necessary, repeat these steps, starting with Step 2 in Configuring Storage to configure additional storage locations.